

How to Build a Bulletproof Take-Off Process: A Step-by-Step Guide for Australian Builders
Jacob Campbell • July 20, 2026
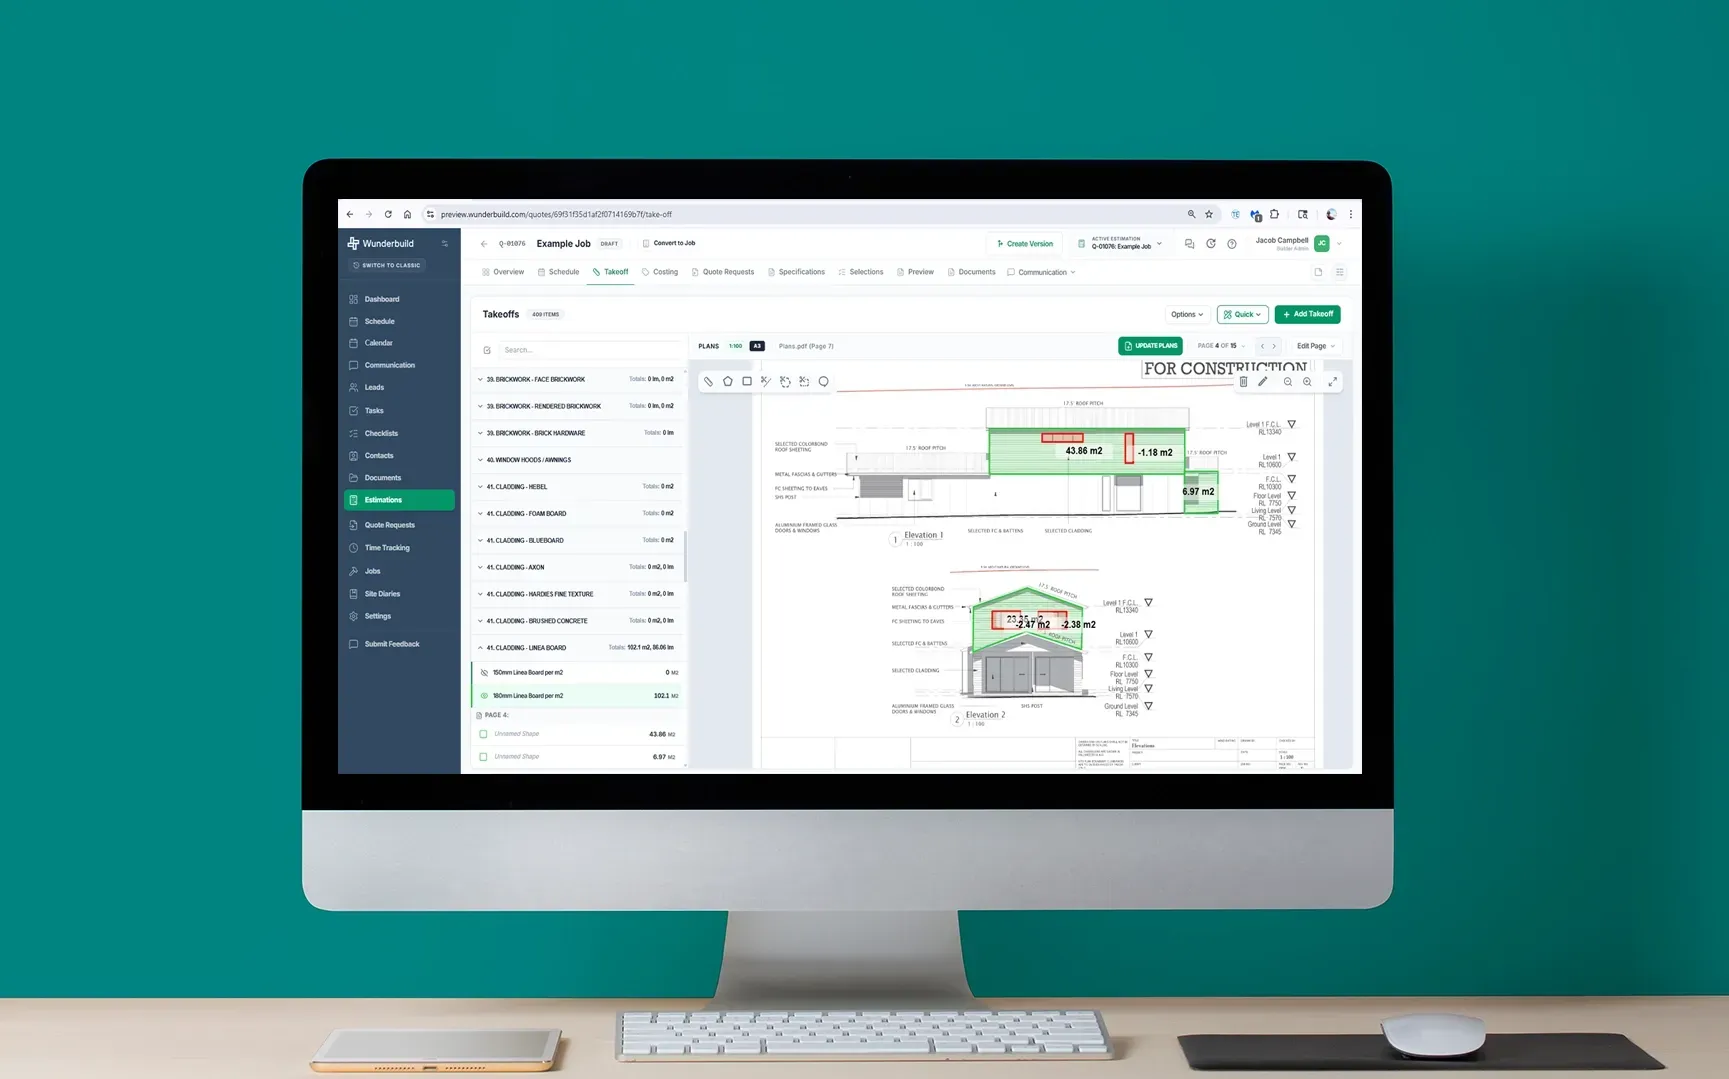
The take-off is where margin is won or lost. Yet most Australian builders have never documented their take-off process. It lives in the head of one estimator — usually the owner — and gets passed on through osmosis when someone new joins the team. The result: inconsistent take-offs, errors that compound through pricing, and quotes that vary wildly depending on who put them together.
This guide lays out an eight-step take-off process that works for residential and small commercial builds. It's designed to be followed by a junior estimator with two weeks of training, audited by a senior estimator in 30 minutes, and refined over time as your business grows.
Why a Documented Take-Off Process Matters
An undocumented process is a fragile process. It can't be taught reliably. It can't be audited. It can't be improved systematically. And when the person who holds it in their head leaves — or just has a bad week — quality drops immediately.
Documented processes do three things that informal ones can't:
• They make estimating quality independent of who's doing the work
• They surface errors as deviations rather than hiding them as judgment calls
• They create the foundation for hiring, software adoption, and process improvement
Builders who scale past $5M in turnover almost always have a documented take-off process. Builders who stall at that level almost always don't.
Phase 1: Pre-Take-Off Preparation
The biggest take-off errors happen before any measuring begins. Skipping preparation is the most common process failure in Australian estimating, and it's also the easiest to fix.
Step 1: Document Review and Sign-Off
Before any take-off begins, confirm you have the latest revision of every drawing, specification, and engineering document. Build a one-page document register listing what you've received, the revision number, and the date received. If the architect issues a revision mid-take-off and you don't catch it, every measurement after that point is wrong.
Red flag: any project where you can't get a complete document set should be flagged to the lead builder before pricing begins. The cost of estimating off incomplete documents is always higher than the cost of asking for what's missing.
Step 2: Scope Clarification
Read every page of the specification before measuring anything. Note every inclusion that's specified but not drawn, every reference to allowances or PC sums, and every clause that shifts cost responsibility ("by builder," "by owner," "to be confirmed"). These are where scope omissions hide.
Output of this step: a one-page scope summary noting what's in, what's out, and what's unclear. Unclear items get logged as questions for the client or designer before pricing finalises.
Phase 2: The Eight-Step Take-Off Sequence
The order matters. Following a consistent sequence ensures nothing gets missed and makes errors easier to trace.
Step 3: Substructure
Site preparation, excavation, footings, slab, drainage. Take off in the order they'll be built. Cross-check concrete volume against slab area × thickness, then check reinforcement against engineering documentation. Excavation quantities should reconcile against fill or removal — site cut and fill rarely balance, and the difference is a real cost.
Step 4: Structure
Framing (timber or steel), structural steel, lintels, beams, posts. Reconcile against the structural engineer's drawings, not the architectural set. Check connection details — bolt counts, brackets, and cleats are routinely under-priced.
Step 5: Roofing and External Cladding
Roof area (including overhangs), gutters, downpipes, flashing, insulation, sarking, cladding. Don't forget waste factors — roofing waste is typically 10–15% on cut roofs, and cladding waste varies by product.
Step 6: Internal Linings and Joinery
Plaster, skirting, architraves, doors, door hardware, joinery (kitchen, bathrooms, built-ins). Joinery should be priced from supplier quotes wherever possible — generic rates are unreliable for anything custom.
Step 7: Services
Plumbing, electrical, HVAC, gas, data. These should come from subcontractor quotes against a defined scope, not from estimator memory. Allow time for trades to quote — rushing this step is one of the top sources of estimating error.
Step 8: Finishes and External Works
Tiling, paint, floor finishes, landscaping, paving, fencing, driveways. External works are the most commonly under-priced category in residential estimating because they're often shown only schematically and require interpretation.
Step 9: Prelims
Site establishment, scaffolding, fencing, traffic management, site sheds, temporary services, dilapidation reports, supervision time, plant and equipment, waste removal, cleaning. Prelims should be priced per-job against site conditions, not lifted as a flat percentage.
Step 10: Margin and Allowances
Apply your overhead and profit margin to the cost base. Add contingency based on project risk profile (typically 2–7% depending on scope clarity, site complexity, and project duration). Document any PC sums and provisional sums with clear assumptions.
Digital Take-Offs vs. Manual Take-Offs
The single biggest accuracy improvement available to most Australian estimators is moving from manual or PDF-marked take-offs to a digital take-off platform. The reasons:
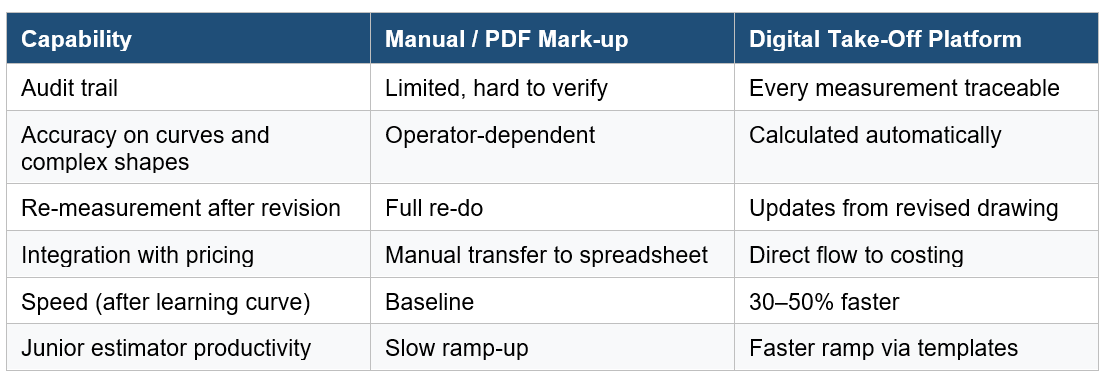
Platforms like Buildxact and Wunderbuild include digital take-off as a core feature. Bluebeam Revu remains popular for builders who haven't yet moved to integrated estimating software. The right tool depends on your business — but staying on manual measurement past a certain volume is a margin tax.
Phase 2: The Eight-Step Take-Off Sequence
The order matters. Following a consistent sequence ensures nothing gets missed and makes errors easier to trace.
Step 3: Substructure
Site preparation, excavation, footings, slab, drainage. Take off in the order they'll be built. Cross-check concrete volume against slab area × thickness, then check reinforcement against engineering documentation. Excavation quantities should reconcile against fill or removal — site cut and fill rarely balance, and the difference is a real cost.
Step 4: Structure
Framing (timber or steel), structural steel, lintels, beams, posts. Reconcile against the structural engineer's drawings, not the architectural set. Check connection details — bolt counts, brackets, and cleats are routinely under-priced.
Step 5: Roofing and External Cladding
Roof area (including overhangs), gutters, downpipes, flashing, insulation, sarking, cladding. Don't forget waste factors — roofing waste is typically 10–15% on cut roofs, and cladding waste varies by product.
Step 6: Internal Linings and Joinery
Plaster, skirting, architraves, doors, door hardware, joinery (kitchen, bathrooms, built-ins). Joinery should be priced from supplier quotes wherever possible — generic rates are unreliable for anything custom.
Step 7: Services
Plumbing, electrical, HVAC, gas, data. These should come from subcontractor quotes against a defined scope, not from estimator memory. Allow time for trades to quote — rushing this step is one of the top sources of estimating error.
Step 8: Finishes and External Works
Tiling, paint, floor finishes, landscaping, paving, fencing, driveways. External works are the most commonly under-priced category in residential estimating because they're often shown only schematically and require interpretation.
Step 9: Prelims
Site establishment, scaffolding, fencing, traffic management, site sheds, temporary services, dilapidation reports, supervision time, plant and equipment, waste removal, cleaning. Prelims should be priced per-job against site conditions, not lifted as a flat percentage.
Step 10: Margin and Allowances
Apply your overhead and profit margin to the cost base. Add contingency based on project risk profile (typically 2–7% depending on scope clarity, site complexity, and project duration). Document any PC sums and provisional sums with clear assumptions.
Ready to quote faster?
Book a free 15-minute call with our team and we'll show you how Campbells fits your workflow.
Book a Free Call
Get articles, insights, and lessons straight to your inbox.
No spam, ever. Unsubscribe anytime.